Learning Adobe Flash CS5.5 iPad Editions
 |
iPad specific multi-touch ebook versions for the Learning Adobe Flash CS5.5 tutorials are available from the iTunes iBookstore and there are sample books on their iTunes pages. The links to access the pages on iTunes are: |
||
Learning Adobe Flash CS5.5 Module 1 |
Learning Adobe Flash CS5.5 Module 2 |
||
Support files that provide all the images, videos and sample animation required to complete the activities are included with the product. |
|||
Module 1 Chapter Descriptions
Chapter 1: Getting Started With Flash CS5.5
This chapter introduces students to the Flash interface. It includes:
-
the components of the Flash screen including the workspace and the panels.
-
using rulers, grids and guides.
-
using simple drawings tools - rectangle, oval, line and brush.
Chapter
2: Drawing Tools
This chapter introduces the Flash Drawing Tools in more detail including:
cookie cutting.
-
the Selection tool.
-
the Pencil, Brush, Paint Bucket and Ink Bottle tools.
-
The Eyedropper and Eraser tools.
-
Object Drawing.
-
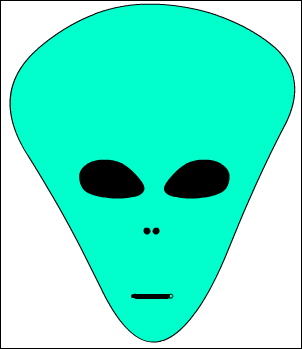
the assignment involves the drawing of an alien.
Chapter
3: Symbols, Libraries and Layers
 Demonstrates
how to use symbols, libraries and layers which are an integral
part of Flash animations. It includes:
Demonstrates
how to use symbols, libraries and layers which are an integral
part of Flash animations. It includes:
-
how to create a symbol and use it from the Library panel.
-
how to create layers, change their order, lock them and turn them on or off.
-
the assignment involves the creation of a simple web page using layers.
Chapter 4: Motion Tween Animations
Demonstrates how to create simple motion tween animations. It includes:
-
creating symbols.
-
setting a motion tween.
-
rotating objects in animations.
-
scaling objects.
-
adjusting the motion path.
-
inserting keyframes.
-
adjusting the length of animations.
-
clearing keyframes.
Chapter
5: Multiple Object Animations
Demonstrates how combine more than one object in an animation. It includes:
-
setting fixed objects in layers and locking them.
-
inserting frames.
-
setting the stage colour
-
animating objects in their own layers.
-
adjusting the shape of animated objects.
-
students create a bouncing ball animation.
Chapter 6: The Motion Editor Panel
Demonstrates how to use the Motion Editor panel to edit and fine-tune animations. It includes:
-
setting the easing of the animation.
-
applying the easing to the animation.
-
adjusting the path of the animation.
-
adjusting the colour of symbols in the animation.
Chapter 7: Other Tweening Types
Demonstrates the two other tweening types that Flash provides, Shape Tweening and Classic Tweening. It includes:
-
changing a circle into a rectangle then back to a circle again by reversing frames.
-
using shape hints.
-
reversing animations.
-
copying frames.
-
creating classic tweens.
-
inserting keyframes.
Chapter 8: Fixed Point Animations
Demonstrates how to make objects animate around a fixed point. It involves:
-
editing symbols to set the registration (rotation) point.
-
setting the rotation.
-
animating the hands of a clock.
-
animating more that one object.
-
the assignment involves students creating a car speedometer.
Chapter 9: Circular Animations
Demonstrates how to set objects to animate around an enclosed path. It includes:
-
creating symbols.
-
adjusting motion paths.
-
setting beetles to race around a track.
-
stopping an animation.
-
adding and removing frames.
-
the assignment involves students creating a solar system animation.
Chapter 10: Frame By Frame Animations
Demonstrates how to set Frame By Frame animations, which mimics how animations were created before the use of computers. It includes:
-
drawing an eye, copying the eye then making one eye wink.
-
keyframes are duplicated and the contents of the duplicate modified.
-
the assignment involves students creating an eclipse of the sun animation.
Chapter
11: Creating Movie Clips
This chapter introduces:
-
the creation and use of movie clip symbols.
-
self-contained animations are created then placed in other animations.
-
multiple instances of the movie clips are added to the animation.
Chapter 12: Creating Buttons
Demonstrates how to create Flash buttons. It includes:
-
setting button symbols.
-
setting the up, over and down states.
-
setting the hit area.
-
creating a navigation bar for a web site
-
using Flash's prepared buttons.
Chapter 13: Publishing Animations
Demonstrates how to publish animations. It includes:
-
the difference between .FLA and .SWF files.
-
publish settings.
-
Document size.
Project 1: iSounds
This project is only available in the multi-user versions. It involves students creating an opening page for the iSounds company which sells music over the internet. Students are required to create a web page that includes at least 2 animations and a navigation bar that has Flash buttons.
Module 2 Chapter Descriptions
Chapter
14: Using Masks
Demonstrates how use masks in animations. It includes:
-
creating a mask layer.
-
setting the mask effect.
-
animating the mask to create a spotlight effect.
-
creating masks as movie clips.
-
animating the movie clip mask.
Chapter 15: Using the 3D Tools
Demonstrates how to use the 3D Rotation and 3D Translation tools to add 3D effects to animations. It includes:
-
rotating movie clips over x, y and z axes.
-
adjusting the perspective angle.
-
adjusting the vanishing point.
-
adding the rotations to animations.
-
translating movie clips in the x, y and z axes.
-
creating movie credits that vanish into the screen.
-
applying the 3D tools on imported images.
Chapter 16: Using Behaviours
Demonstrates how to make use behaviours to make animations interactive with the screen. A firing a gun animation that could be used in computer games is created. Click on the gun in the sample to see the effect. The chapter involves:
-
setting invisible buttons.
-
setting and editing behaviours.
-
adding sounds to behaviour .
-
adding sounds to buttons.
-
deleting behaviours.
Chapter
17: Animation Still Photos
Demonstrates how to animate sections of a still photo to give the impression that they are a moving object. It includes:
-
breaking a photo into pixels.
-
erasing the sections to be animated.
-
converting the sections to symbols.
-
setting the registration point.
-
animating the sections.
Chapter 18: Using the Bone Tool
Demonstrates how to use the Bone tool to produce arm and leg movements in animations. It includes:
-
the bone tool basics.
-
adjusting the Bone tool styles.
-
selecting Runtime so that the user has control of an object's movement.
-
animating imported images.
-
animating shapes drawn in Flash.
-
applying the spring effect.
Chapter 19: Adding Sounds to Animations
Demonstrates how to include and control sounds by adding an engine track to the car speedo animations created in an earlier chapter. The chapter includes:
-
Adding sounds to the library.
-
synchronizing sounds.
-
using fade in effects.
-
removing sound effects.
-
editing sound effects.
-
adding sounds to buttons.
Chapter 20: Code Snippets
Demonstrates how to add code snippets to movie clips. The chapter includes:
-
controlling objects with the keyboard arrows.
-
attaching a movie clip to the mouse pointer.
-
attaching web links to objects.
-
fading a movie clip.
-
applying multiple code snippets.
Chapter 21: Text Formatting
Demonstrates how to format text using the new TLF text engine. The chapter includes:
-
Making text selectable, editable or read only.
-
linking text to web sites.
-
Formatting paragraphs.
-
Aligning text.
-
Line spacing.
-
Setting text into columns.
-
Flowing text from one text box to another.
-
Animating text messages.
Chapter 22: Text Effects
Introduces the use of more detailed text effects including:
-
breaking text into layers
-
using guide layers.
-
animating the letters of a word.
-
distorting text
-
creating text shape tweens.
Chapter 23: Text Effect Movie Clips
Demonstrates how to create text effects as movie clips and include them in animations. It includes:
-
breaking text apart
-
distributing letters to layers
-
animating letters within the movie clip.
-
using the movie clip.
-
editing the movie clip.
Chapter 24: Using Scenes
Demonstrates how to use scenes within Flash to build an overall animation. It includes:
-
adding and naming scenes.
-
adding content to scenes.
-
duplicating scenes
-
stopping the overall animation.
Chapter 25: Useful Tools
Demonstrates how to use some of the extra tools that Flash provides. It includes:
-
converting video clips to FLV/F4V format.
-
importing FLV/F4V video clips into Flash.
-
using the Deco tool.
-
using the Spray Brush tool.
-
using the Pen tool.
-
using motion presets to quickly animate objects.
-
creating custom motion presets.
Project 2: Alby's AutoBarn
This project is only available in the multi-user versions. It involves students creating 4 separate scenes for a used car dealer that could be added to a web site using the skills developed in Module 2.
| Home | Products | iPad | Downloads | Testimonials | Ordering | Contact Us |